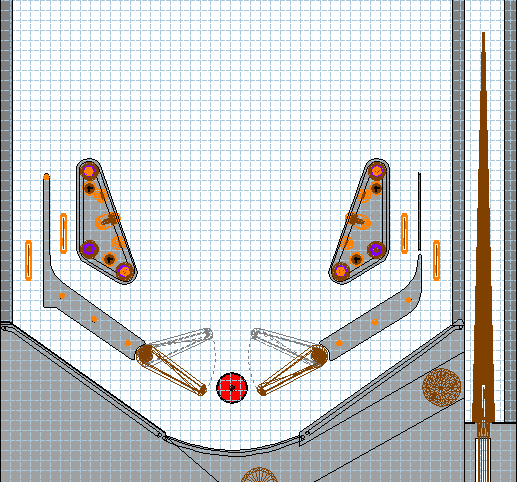
At the very center end of the table lies a drain, to the left and right of the drain, the flippers. These flippers will be the player's primary form of direct control over the pinball. Next to these flippers are their respective lanes. Depending on how you shoot the pinball and how it will return the the bottom end of the field these lanes may spell out life or death for your current ball! If the ball lands in the lane, your reflexes have a chance to return the ball back into the play field. But should it land in the outside lane then your ball is doomed to the drain!
 |
| As you can see there are the left inner/outer lanes and right inner/outer lanes |
I thought to myself that it would be rather useful to learn how to make a slingshot. So, I began to take it apart. The default slingshot is comprised of a rubber, a surface and approximately 4 or 5 pegs. In fact when making a rubber,you don't need to insert the pegs for any other reason besides blue-print/engineering purposes. In other-words, where your pegs are in your slingshot do not effect how it acts. At least, not in this program.
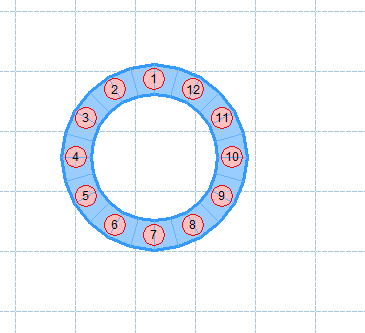
In order to create a slingshot, first select rubbers and then select "shape-able" Future Pinball will produce the following item below.
The number circles represent points that can be moved in order to create the desired shape. I will be creating a regular slingshot like the ones depicted above. You will notice that these points can be deleted as well as inserted into the shape-able rubber by selecting the points and right-clicking and selecting "insert new shape point" or by selecting "delete" to delete it. I have chosen to create a shape and then delete the extra points.
Here is an example.
After we have the desired shape, all you have to do is right click the point where you want the launching mechanism to be placed and select "Special attribute" and "slingshot".
This will create a launching mechanism that will propel the rubber in a desired direction and thus launch the ball in that direction as well. Notice the purple line that now surrounds the entire rubber shape. This indicates what the shape will transform into when it is engaged thus propelling the ball away in those directions.
After that you can add pegs and surfaces for decoration!
I will talk about pegs and surfaces in another post, but for now, here is my finished product!
One slingshot ready to bash pinballs back!


